Photo by gaspi the artist on Unsplash
Voice acting from home has become increasingly popular, allowing talent from around the world to audition and work on various projects without needing to travel to a professional studio. However, achieving high-quality recordings from home requires more than just a good microphone; it demands an optimal recording space.
I record in a closet with a feather duvet that I use for sound absorption. My sound isolation (external noise) is an ongoing challenge which might require me to move the entire space elsewhere in my house. For now however, it’s a simple set up. The advice that follows is more comprehensive and gets into other options that you may find helpful to solve for your specific needs. Please don’t spend a ton of money to get a “perfect” space without first experimenting with spaces and found objects that you already own.
Choose the Right Location
Quiet Environment
Select a room as far away from outside noise sources as possible. Avoid rooms with windows facing busy streets, and opt for an interior room if possible. Basements can be excellent choices due to their natural insulation from external noise. This is where my studio is currently located. Just be aware that the ground can carry sound and vibrations that may resonate through your home’s foundation.
Size and Shape
A smaller room with irregular shapes tends to work better as it reduces the chances of sound reflections that cause echoes. Avoid large, empty rooms as they can create a lot of reverb. A closet is a perfect space to try out.
Acoustic Treatment
Inexpensive Materials
You don’t need to invest much or anything at all for material that will do a great job at absorbing sound such as thick curtains, blankets, carpets, or unused duvets in my case. If you’re planning to set up in an open room, inspect the room for any gaps around windows, doors, and other openings. You might want to ensure these are sealed (e.g. weather stripping) if you hear noise coming in from just outside that space.
Below are some things that I’m not currently using but if I move my space (which is likely), I will consider the following to ensure dampening and isolation (especially from the dog next door with the insanely loud bark).
Absorption Panels
Install acoustic panels on the walls to absorb sound waves and prevent them from bouncing around. Place these panels at ear level where your voice will hit the walls directly.
Bass Traps
Corner bass traps absorb low-frequency sounds that can muddy your recordings. Place them in the corners of the room to help manage bass frequencies if you detect these low-frequencies in your recordings.
Diffusers
Diffusers scatter sound waves in different directions, preventing echoes and standing waves. They are particularly useful in larger spaces where absorption alone isn’t sufficient.
Setting Up Your Equipment
Microphone
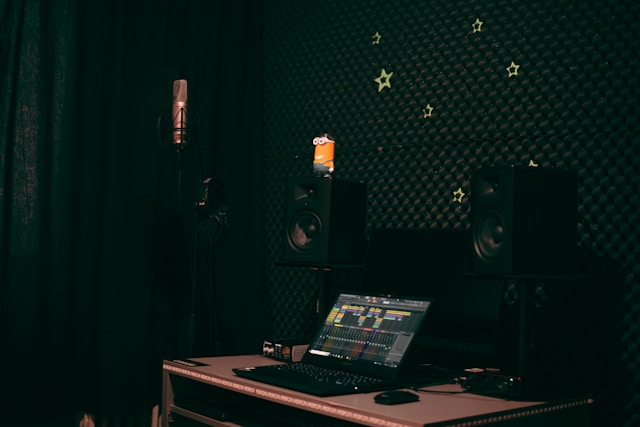
Invest in a high-quality condenser microphone, as it captures a wide range of frequencies and details in your voice. Make sure to use a pop filter to reduce plosive sounds (like “p” and “b”). I use a Rode NT1 5th Generation.
Microphone Stand or Studio (boom) Arm
A stable microphone stand or boom arm will be needed for any mic. A shock mount will help to reduce vibrations from the floor or desk. I use a Rode PSA1+ Studio Arm and love it.
Audio Interface
An audio interface converts your microphone’s analog signals into digital signals for your computer. It will be required equipment to power any XLR condenser microphone. Choose one with low latency and high-quality preamps. I use a Focusrite Solo 3rd Gen which is super easy to set up and I love the small form factor.
Headphones
Closed-back headphones are ideal for monitoring your recordings without any sound leakage that can be picked up by the microphone. Not all headphones are created equal. Make sure that you use headphones that are specifically meant for studio monitoring. I use Sony’s MDR7506.
Creating a Comfortable Space
Ergonomic Setup
Ensure your recording setup is comfortable. Your microphone, computer, and other equipment should be positioned to avoid strain on your body during long recording sessions. An adjustable chair and a desk that allows for proper posture are essential if you prefer to sit while recording. My preference is to stand though this doesn’t negate the need to ensure that your work surface is aligned properly to your body position.
Lighting
Good lighting can help reduce eye strain, especially if you’re reading scripts from a screen. Sure, natural light is ideal, but if your in a closet, this is not really possible. You can invest in adjustable LED lights that mimic daylight or just ensure that you have plenty of light to see what your reading if you’re not using a monitor.
Temperature Control
Keep your recording space at a comfortable temperature. Excessive heat can make it uncomfortable to work which can noticeably affect your performance. If you use a fan or air conditioner, make sure it doesn’t produce noise that could be picked up by your microphone or get in the habit of turning it off before you hit record.
Creating an optimal recording space at home for voice acting is a blend of choosing the right location, implementing soundproofing and acoustic treatment, setting up high-quality equipment, and ensuring your workspace is comfortable and ergonomic. With careful planning and regular adjustments, you can achieve professional-quality recordings right from your home. Happy recording!